The production process of cordless impact wrenches involves a lot of fancy manufacturing and quality control to make sure durability, reliability, and efficiency. Here’s a general outline of how they’re made :
1. Design and Prototyping
Concept Development
- Market Research: Figure out what your target users need and what’s missing from the market.
- Requirement Specification: Write down what your cordless wrench needs to do. This includes things like the torque range, size, weight, battery life, and ergonomic features.
Preliminary Design
- Sketching: Start with hand sketches or digital drawings to explore different design ideas.
- CAD Modeling: Use computer-aided design (CAD) software to make detailed 3D models of your wrench. This step involves designing all the mechanical parts, the housing, and any custom parts you need.
- Component Selection: Pick off-the-shelf parts like motors, batteries, and electronic controls, or design your own parts if you need to.
Electronics and Software Development
- Circuit Design: Design the electronic circuits you need to control the motor and do other stuff, like a torque control system, battery management system, and user interface.
- Software Development: Write firmware for the microcontroller to control things like motor speed, direction, and user interface stuff.
Prototyping
- Rapid Prototyping: Use 3D printing, CNC machining, or other rapid prototyping techniques to make physical models of your wrench and its parts. This is important so you can see if your design works, if it’s comfortable to hold, and if it does what you want it to do.
- Assembly: Put the prototype together. This includes all the mechanical parts, electronics, and anything else you need. Make sure everything fits together like it’s supposed to and that the wrench works like it’s supposed to.
- Testing: Test the crap out of your prototype. See how it performs, how long the battery lasts, how tough it is, and how people like using it. Make changes to your design based on what you learn.
Iteration
- Feedback and Refinement: Get feedback on your prototype from people who might use it, technicians, or other experts. Use that feedback to make your design better.
- Iterative Prototyping: Make changes to your design and prototype based on the feedback and test results. You might have to do this a few times to get everything just right.
Finalizing the Design
- Detailed Engineering: Finish up all the engineering stuff. Make sure all the parts are designed so they can be made and put together.
- Documentation: Make detailed documentation. This includes CAD files, schematics, assembly instructions, and specifications.
Preparing for Manufacture
- Tooling and Molds: Get ready to make a bunch of these things by making molds for the plastic parts and tools for any custom parts you need.
2. Material
Choosing the right material for your cordless impact wrench is super important. It affects how well it works, how long it lasts, and even how comfortable it is to use.
Understanding the Components
A cordless impact wrench is made up of a bunch of different parts, and each part needs to be made out of the right material to work well :
- Motor Housing and Gearbox: These parts need to be strong but light so they protect the inside parts and are easy to hold.
- Handle: You want it to feel good in your hand. The material should also be grippy, not get slippery when you sweat, and not get messed up if you drop it.
- Internal Gears: You need materials that can handle a lot of torque and use without wearing out.
- Battery Casing: You need something that can take a beating and protect the battery cells from getting messed up by getting dropped or getting wet.
Material Selection
- High-Grade Steel for Internal Gears and Mechanisms: High-grade steel, like chrome-molybdenum or chromium-vanadium alloy, is perfect for the gears and other moving parts inside an impact wrench. These materials are super strong for their weight and don’t wear out easily, so they can handle the high torque and fast impacts that impact wrenches are known for.
- Aluminum for Motor Housing and Gearbox: Aluminum is a popular choice for the motor housing and gearbox due to its lightweight and strong characteristics. It aids in heat dissipation, keeping the tool cooler during operation, and contributes to the overall durability without adding excessive weight.
- Reinforced Plastic for Handles and Battery Casing: For the handle and battery casing, reinforced plastics, such as fiberglass-reinforced nylon, are excellent choices. These materials are not only durable and impact-resistant but also lightweight. They provide a comfortable grip, which is crucial for long periods of use, and can be engineered to absorb vibrations, reducing user fatigue.
- Rubber or Soft-touch Materials for Grips: Incorporating rubber or soft-touch materials in areas where the user frequently holds the tool can significantly enhance comfort and grip. These materials can also reduce slippage, making the tool safer to use.
- Reinforced Plastic for Handles and Battery Casing: For the handle and battery casing, you want to use a tough plastic with some reinforcement, like fiberglass-reinforced nylon. These materials are tough and can handle getting dropped, but they’re also light. They feel good in your hand, which is important if you’re going to use the tool for a long time, and they can be designed to absorb vibrations, so you don’t get as tired using the tool.
Considerations for Material Selection
- Durability vs. Weight: Finding the right balance between durability and weight is key. Heavier materials may offer more durability but can lead to user fatigue over long periods.
- Cost: While higher-grade materials may offer better performance and durability, they can also significantly increase the cost. It’s important to find a balance that keeps the tool affordable for its target market.
- Environmental and Chemical Resistance: Depending on the typical usage environment, you need to select materials for their resistance to corrosion, chemicals, and extreme temperatures.
- Manufacturability: You also need to consider how easy it is to manufacture with the materials you choose. Some materials that offer high performance may be difficult or expensive to shape, join, or finish.
Let’s enhance the table by adding more detailed performance characteristics for each steel grade, such as hardness, ductility, and typical heat treatment processes, which are critical factors in selecting materials for manufacturing tools like cordless impact wrenches.
| Steel Grade | Tensile Strength (MPa) | Yield Strength (MPa) | Hardness (HB) | Ductility | Heat Treatment | Applications |
|---|---|---|---|---|---|---|
| High-Strength Steel | ||||||
| AISI 4140 | 655 | 415 | 197-237 | Moderate | Quenching & Tempering | High-stress components, gears |
| AISI 4340 | 745 | 470 | 217-248 | High | Quenching & Tempering | Aerospace, automotive parts |
| Medium-Strength Steel | ||||||
| AISI 1045 | 585 | 310 | 163-187 | High | Normalizing | Machinery parts, bolts |
| AISI 8620 | 530 | 385 | 149-167 | High | Carburizing | Gears, shafts |
| Low-Strength Steel | ||||||
| AISI 1020 | 420 | 350 | 111-129 | Very High | Annealing | Light-duty parts, housings |
Performance Characteristics:
- Hardness (HB): This tells you how resistant the material is to deformation. Higher numbers mean the steel is harder and more wear-resistant.
- Ductility: This tells you how much the material can deform under tensile stress. High ductility means the material can stretch more before it breaks, which is important for parts that undergo bending or stretching.
- Heat Treatment Processes:
- Quenching & Tempering: This increases strength and toughness. It’s used for high-strength steels like AISI 4140 and AISI 4340.
- Normalizing: This improves mechanical properties and gives you a more uniform microstructure. It’s suitable for medium-strength steels like AISI 1045.
- Carburizing: This adds a hard surface layer while keeping a softer, more ductile core. It’s ideal for wear-resistant surfaces like the gears made from AISI 8620.
- Annealing: This softens the steel, making it more ductile and workable. It’s why AISI 1020 is so easy to machine and form.
These enhanced properties provide a more comprehensive overview of each steel grade, helping engineers select the most suitable material for specific components of cordless impact wrenches based on performance requirements and manufacturing considerations.
3. Component Manufacturing
With the design finalized, you start making the individual parts. This includes machining the steel parts for the drive mechanism, making the gears, and casting or injection molding the plastic parts. You use advanced manufacturing techniques, such as precision machining and laser cutting, to make sure the parts meet tight tolerances .
The manufacturing of components is typically broken down into several sub-processes, including:
- Machining: Precision machining of metal parts such as gears and shafts, using CNC machines for high accuracy.
- Injection Molding: You make plastic parts like the housing. You do this through injection molding processes where you inject molten plastic into a mold and let it cool to form the shape you want.
- PCB Production: Manufacturing the printed circuit boards (PCBs) that will control the wrench’s electronics, through processes like etching and soldering electronic components.
4. Electronic Assembly and Quality Control
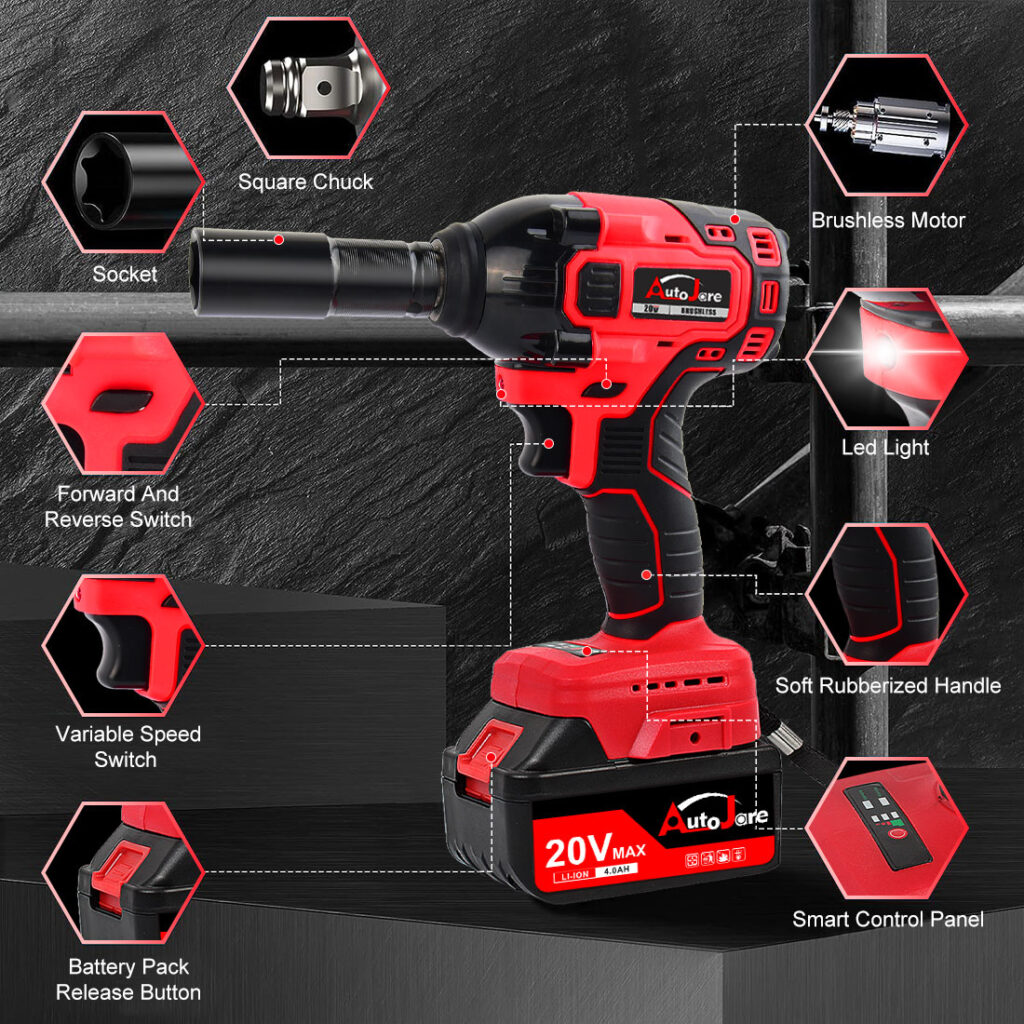
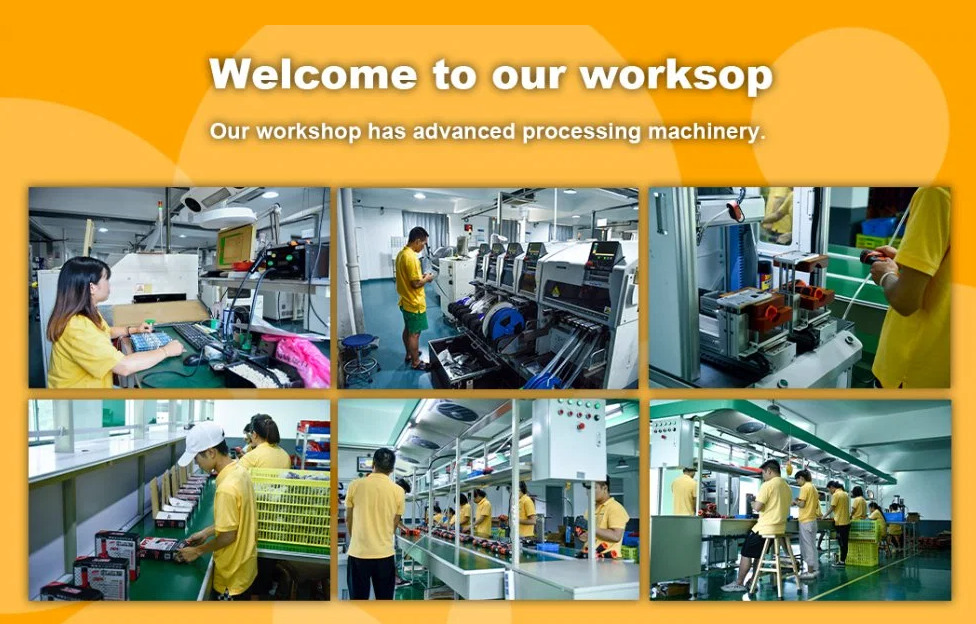
Assembling a cordless wrench is a careful process. You put the parts together on an assembly line. Workers or automated systems install the motor, battery pack, and outer casing. The heart of a cordless wrench is its motor and battery pack. You assemble the motor, usually a brushless type for its efficiency and long life, along with the electronic circuitry that controls the tool. You assemble the battery pack, often lithium-ion for its high energy density and rechargeability, separately. The assembly process involves several steps:
- Sub-assembly: First, you put together smaller parts like the motor assembly, gearbox, and electronic modules.
- Final Assembly: Then you put those sub-assemblies together with other parts like the housing to make the wrench. This is done using a combination of automated assembly lines and manual assembly for precision tasks.
- Testing: Next, you test the wrench to make sure it works and is safe to use. Each wrench goes through a series of tests to make sure it meets the manufacturer’s standards for torque, speed, and battery life. Quality control checks are done throughout the production process to find and fix any defects.
Below Video is sourced from Youtube .
6. Packaging and Distribution
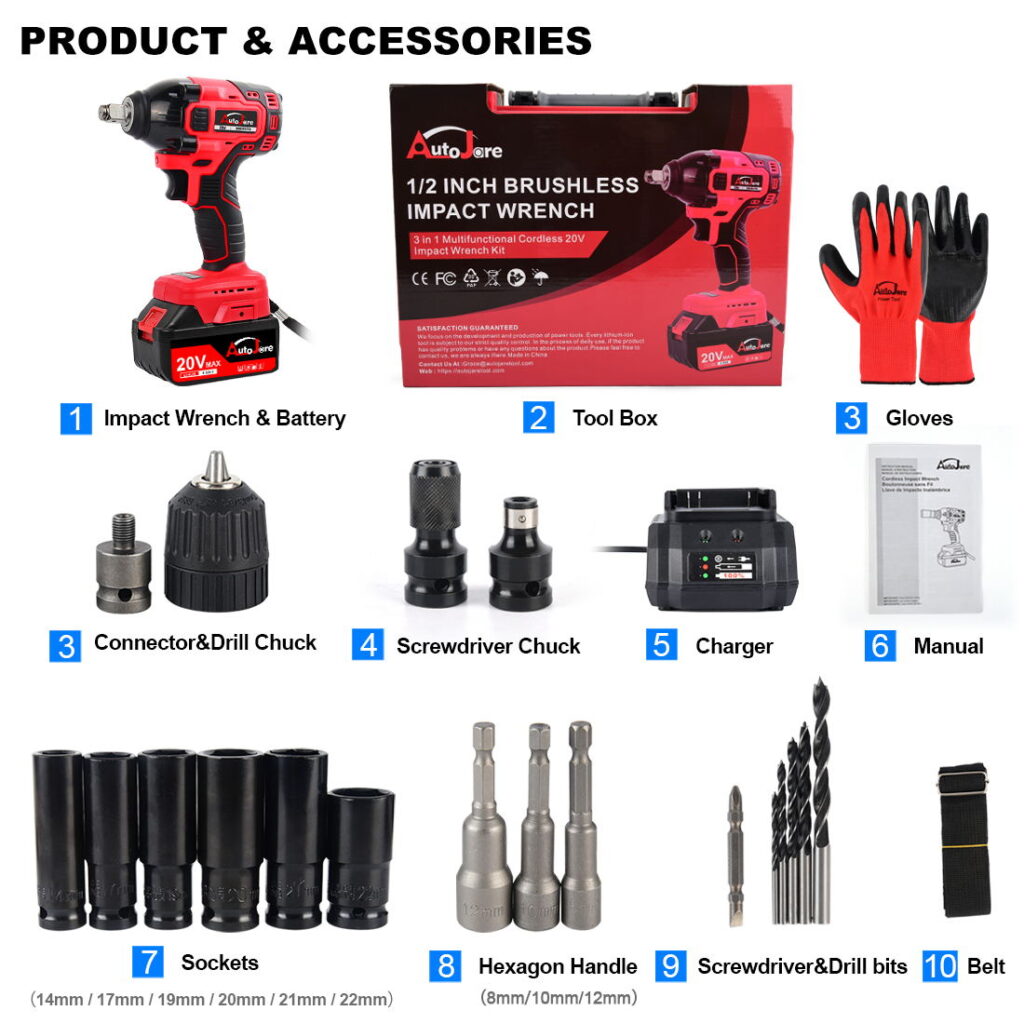
Once the wrenches are put together and tested, they are packaged with the stuff that comes with them. The packaging is designed to keep the wrench safe while it’s being shipped and to give you information about what the wrench does and how to use it. The packaging includes:
- Designing Packaging: Creating packaging that both protects the wrench and looks good to people who buy it.
- Packing: Putting the cordless wrench, along with stuff like batteries, chargers, and instructions, into the packaging.
Conclusion
The production process of cordless wrenches shows how far manufacturing technology and quality control have come. From the first design to the final check to make sure everything works, every step is important to make a tool that professionals and people who like to fix stuff can count on. This careful process is what makes cordless wrenches powerful and versatile, but also reliable and long-lasting.

